Wednesday, December 8, 2010

A Button Making Machine - for my birthday!


I've been wanting a button making machine for a long time, however, it just hasn't been affordable, or a priority. You know the kind of buttons I mean… bright colours, funny pictures/sayings, or to show support for a cause.

I'd like to make some to promote (and sell in) my Etsy shop. It will be fun to make custom orders - of people, their pets, kids, cars, businesses, whatever!

So keep me in mind if you need a button or 2, (or 200)!


I have a birthday this weekend, and it's a BIG one…50th this coming weekend!

Anyhow, my family thought a button maker would make an ideal gift for me, but they wanted me to choose one, so I've been doing some serious shopping around.


After looking, comparing prices, reviews, cost of supplies and more… I decided I on a Tecre 2 1/4' button maker.

I read a lot of good reviews, the parts seem a bit more affordable, however shipping isn't cheap.

(I decided on the standard 2 1/4" because I will also be able to make pocket mirrors, and magnets with that size.)


Now I'm anxiously awaiting it's arrival, and thinking of ideas for the 1st set of buttons. I have a few days off now, so I'm going to figure out designs for the artwork. I'll be ready to make them when my machine arrives.

I'm so excited! I'll let you know how it goes, once I get started.


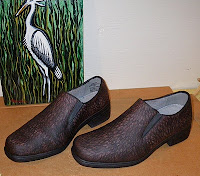
In the meantime, Dave & I are planning to get away for the weekend, to quietly celebrate my 50th birthday, with a bit of shopping in the big city of Cranbrook, a dinner & evening at the casino and a motel room for the night- they'd better have a hot tub somewhere. It'll be fun, to finish my Christmas shopping, and hopefully get new winter boots (mine are falling apart).

It's not often that we go anywhere, but there's always someone home to look after our geriatric dog (Spike), so we should

get away more often.


Well, I'll keep you up to date...

Enjoy your week.

***** ******** **************** *****************

Update: Wed Dec 8/10


( I fixed my boots this morning using hot-melt glue. They aren't pretty, but they'll be fine for home.) So I took Spike for a walk to the mailbox, and guess what?

There was a "parcel pickup" notice in my mail! YES!

That means I will need to go to town tomorrow and pick it up at the Mall.

I wasn't sure if it would arrive before the weekend. I'm so excited!


Some other things to consider:


- I have a decent printer to print my button designs, however, I may be needing specialty papers, and more ink soon.

- Q- How long will it take to actually make the buttons & designs?

A- If I had all the designs made, & cut into circles, it just takes seconds to actually make the buttons, but the designing, printing & cutting can take time!

-Who will buy them from me? (I'm not much of a salesperson... something I've got to work on.)

- Buying the parts isn't too expensive, but the shipping & taxes are!

****** ********** ************** *****************

UPDATE: Dec 9/10

I picked up my button maker today. YEAH!


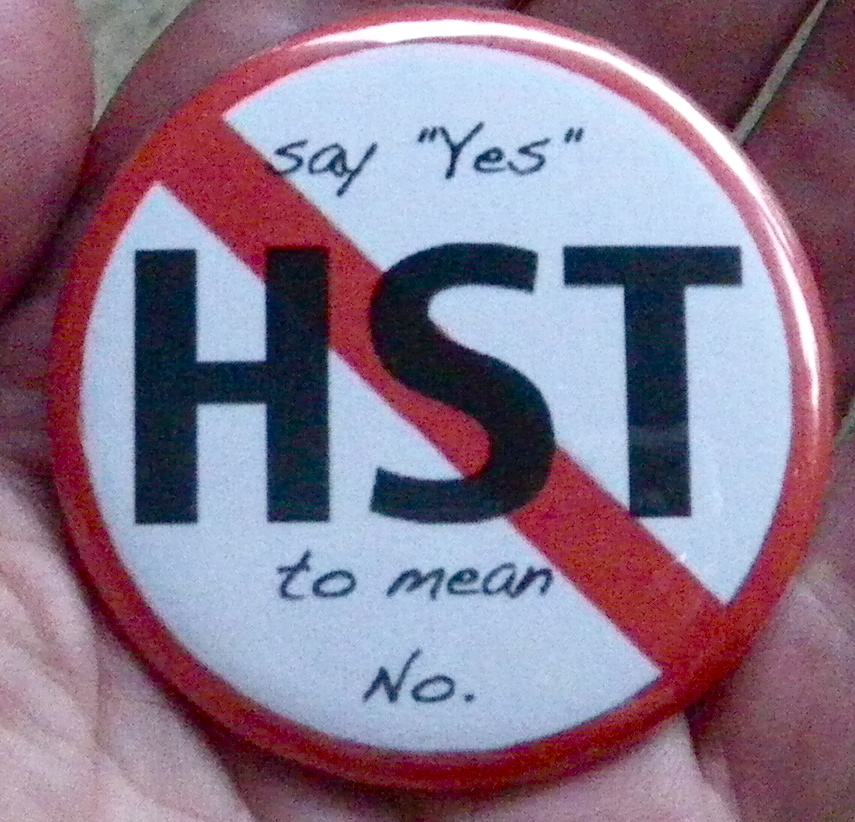
After a little messing around with the directions, and cutting out circles (of some designs I'd printed,) I have successfully made 25 buttons!


Talk about easy! The 1st one has the pin upside down, and on one, I forgot to add the mylar cover, so I screwed up 2. Not bad for a newbie!

It's so quick & easy to actually make the buttons, but designing, printing & cutting them out takes a lot of time.


I've taken a couple of pictures, so you can see my Tecre machine, and some of the pins I've made so far.

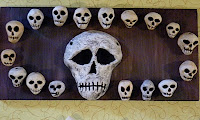
My family has some very politically incorrect ideas for buttons to make. Totally different from what I have in mind...so I've had to do a little censoring, sorry.


Gonna run along now, but if you need a button (or 2, 20, or 200), I'd be happy to make some for you.

You can e-mail me at: smilingbluedog@yahoo.ca


________________________________


Update:

Dec 10/10

Before I go away for birthday weekend, I'd like

to show off my Zibbet shop, where I've listed

a few of my buttons.


Update:

Dec 16/10

Had a wonderful weekend getaway with my husband. So far 50 doesn't seem so old...but it's only been 5 days :)

Anyhow, I've made a whole bunch of new buttons and have some great ideas. (Guess what everyone's getting in their stocking?)

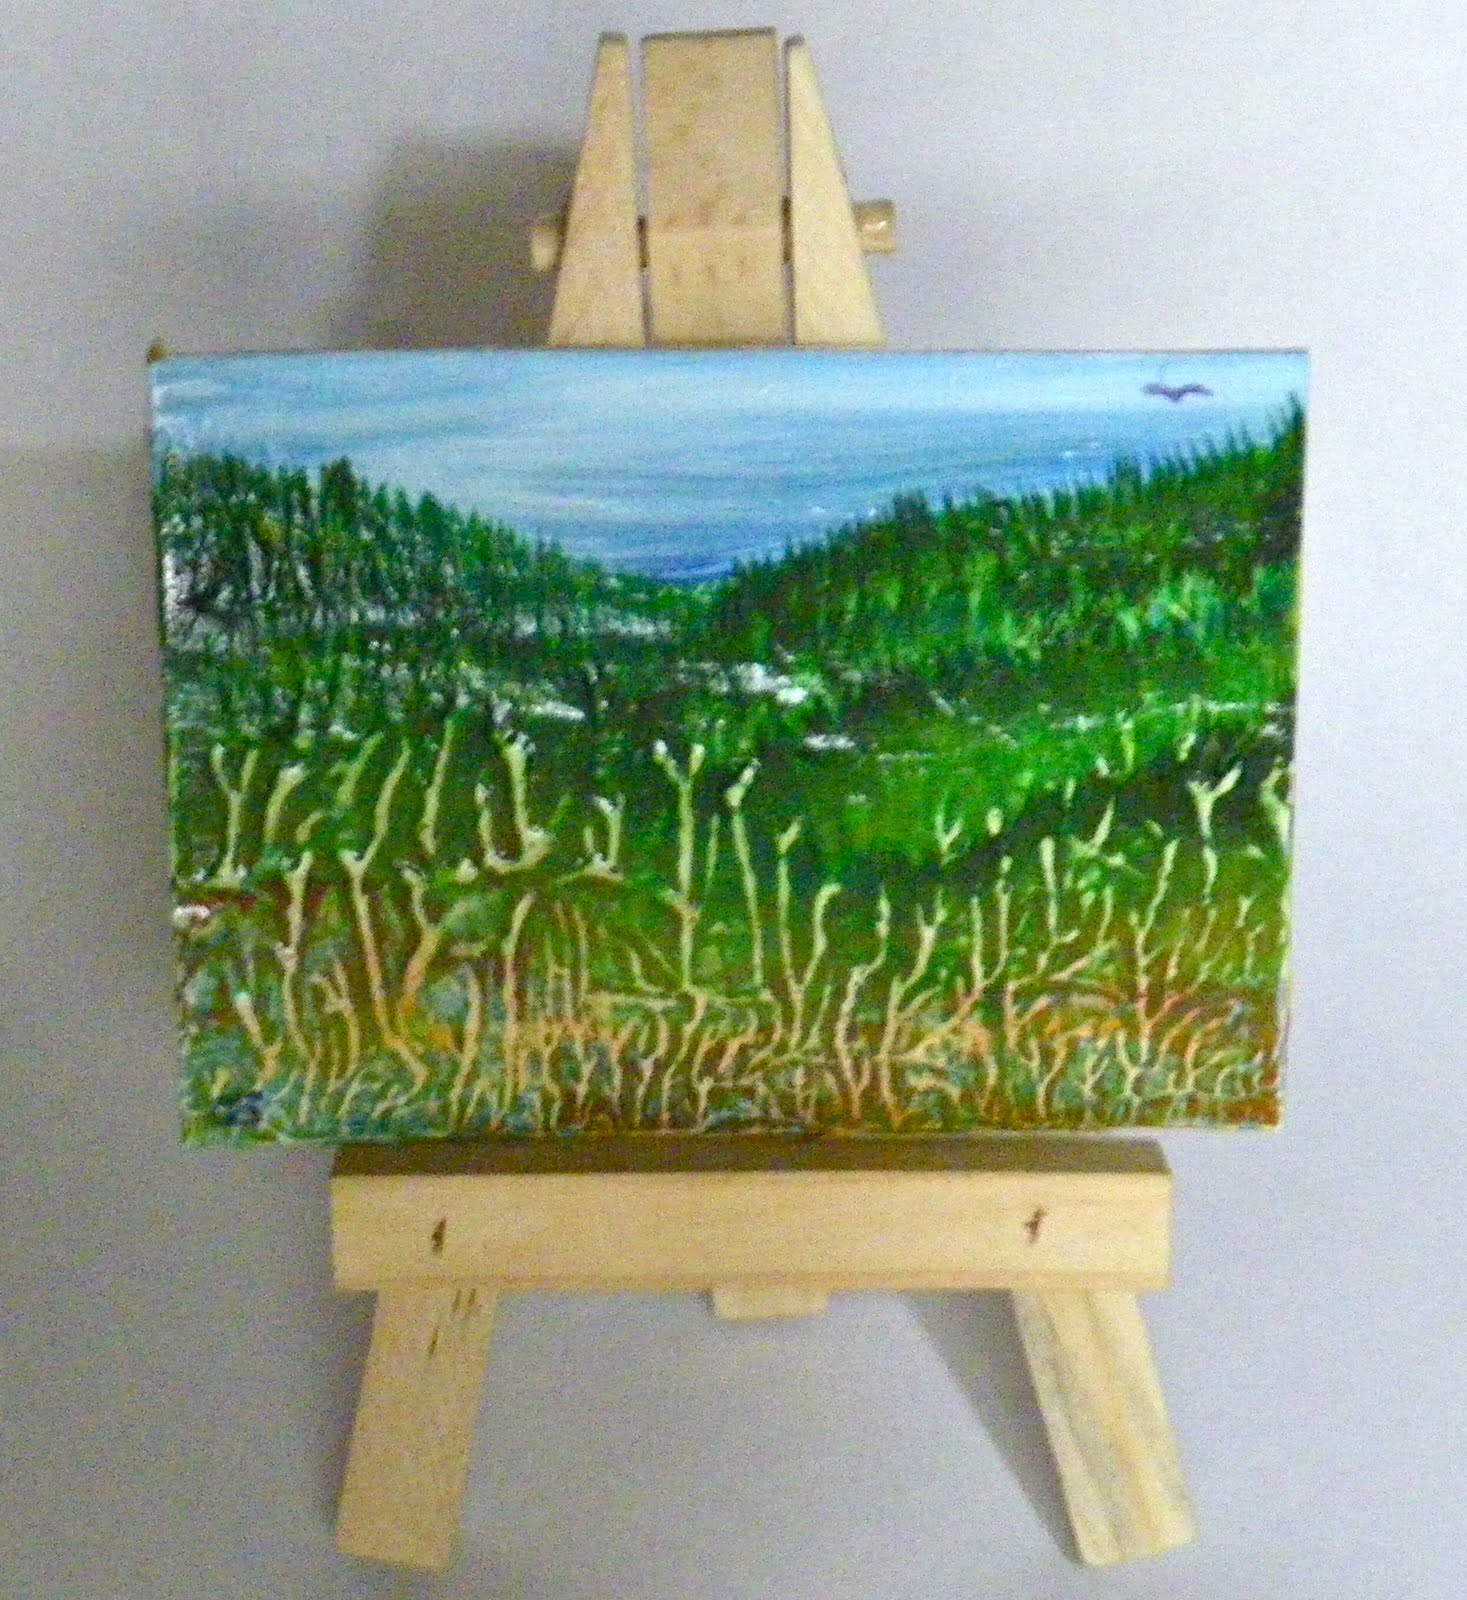
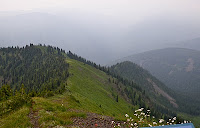
I'd like to see if I can make some to sell locally, so I've edited some of my best photos taken in the Kootenays, and made souvenir buttons.


Update: Oct/11

I am very happy with my button maker, but wish I had a better circle cutter. Should've spent the extra $$, but didn't have it then, and still don't.

This is something Dave can do and he likes it!

I design and print them, while he cuts them out & assembles the buttons... and it doesn't hurt his back :) YES!


Thursday, November 25, 2010

Do you like to shop on-line?

Growing up in Toronto, and shopping at big Malls, like the Eaton Centre downtown has spoiled me for shopping.

As a teenager, I had more disposable income, time, and access to the best variety of shops. Shopping was an exciting event, and crowds just made it more interesting, a quick break for a pop & french fries were an added bonus.

That was in the 70's- before the Internet, e-Bay & on-line shopping.

Now (over 30 years later,) I'm living in the Kootenays, a rural area in South Western B.C. and shopping is very limited. We have a Mall in town. It is modest- however, so is my income, time and desire.

BUT…nowadays there's also a whole world of shopping available... on-line.

The 1st item I ever bought on-line was a video game for my boys (they talked me into it). We went to E-Bay, looked up "Lord of the Rings" for their Xbox, bought it, and were thrilled when it finally arrived in our mail! How cool is that?!

Instead of just bills, there was something to look forward to in our mailbox. I've never looked back.


In my little circle, I'm probably the only one that ever buys anything on-line. Some of my friends still don't have computers, let

alone the Internet!


Some of the jewelry I've made.


I often get my jewelry and craft supplies on-line through E-Bay and Etsy, or at my local bead shop- Abacus beads.


I also enjoy just "window shopping" on-line (That would be a pun, if I wasn't using a Mac,) but I'm just not sure about buying shoes and clothes on-line. There's nothing compared to actually trying something on.

Over the years I've bought plane tickets, eyeglasses, video games, jewelry, my iMac, beads, slippers, and even a clutch for our Toyota… all on-line.

Some of the things I like about shopping on the Internet, is that it's available any time, I don't have to dress up & drive anywhere, no pressure, no crowds, infinite variety, and the best part… is going to the mailbox.

Tuesday, October 26, 2010

Mermaid Painting

For some time, I've been wanting to paint a mermaid, and a fantasy ocean scene.
I need to practice painting faces, so that's one of the (many) challenges in this piece.


In February (2010), I finally started, by using a blue wash, once it was dry I blocked in the mermaid's basic shape and colour.
She was too fat, but at least it was a start.
(I was also working on this heron painting, while waiting for the paint to dry.)


By Feb 22, I had finished the basic details of the the mermaid's face, hair, and upper body. I used frisket to protect those parts, so I could continue painting without worrying about ruining her. (That's why she looks kind of blue & lumpy- frisket is amazing stuff... you can paint over it, and then peel it off to expose the painting underneath.)
I was thinking of her floating on a bed of waves, or bubbles, but wasn't happy with it.


So I worked on the fish end of her, with scales and her tail. (Sorry about the ceramic fish- I often use my paintings for backgrounds on items I'm listing in my Etsy shop.) Anyhow, I used frisket to protect the rest of my mermaid, so she'll be safe while I work out the rest of the painting.

Then life happened, we went on strike for over 2 months! My energy was diverted into picketing, painting picket signs, and writing a blog for us & to keep everyone up to date, on the events.

It's taken me a long time to get back into the right frame of mind, to continue this painting.
I've made a couple of little (mini) paintings, and LOTS of jewelry. Working with beads, and gemstones makes me happy, and the results are so much quicker than painting, which is even quicker than clay, (which I have yet to return to.)


Anyhow, mid-October I started a mountain scene LARGE painting, and yesterday I finally pulled out my mermaid, to tackle the problem I created with the "pillow of waves".
Since the mermaid was covered in frisket, I was free to do whatever I wanted to the background, without damaging her. So, I totally changed the background and foreground.

I used stronger colours and some gesso to create texture for the foreground (like I did with my 1st ACEO).
I love the way the background turned out, there's some pleasant surprises in it, and it's got way more energy now.


I started working on the mid & fore ground. Using gesso, I blocked in the coral, and added even more texture to the forground, then used cadmium red and yellow, mostly.

I painted and then removed a lot of the paint, so that the texture of the gesso would show through and look like plants.

I made a couple of rubber stamps so that I can quickly add lots of fish- that are identical.


I'm not quite done yet, I think I just need to add some highlights and details, but I am pleased with the results so far.


This is where I stopped (at midnight. )
I've spent a good part of the last 2 days working on this painting.
I'll try & get her done tomorrow and post a completed photo,
with decent lighting & the tripod.

******************************************************
November 1st - update...


Well... I couldn't consider this painting complete after all. For one thing... I wasn't happy with her face.
Being the focal point of the whole painting, I think it's important that she look the way I want her to. (BTW, that was one of the main reasons for doing this painting!) Sooo.....
Yesterday, I redid her face, but left her eyes alone, since that was the only part of her face that I was pleased with.


I'm so much happier with her face now, the seaweed with seahorses gives the foreground some interest, as do the crabs. I added some more fish tucked in between the coral to add a little more depth, and a pink jellyfish. There's so many more creatures I could add, but it'll have to wait 'til the weekend now.
(My weekends= Sun/Mon, usually.
To paint, I need to be in the right frame of mind, have lots of time & patience, so I don't paint after work.)

**************************

Tues. Aug 16/11
Update.
I've started and completed several small paintings, one large painting, and some jewelry, since I set my mermaid aside. It's too bad, as this has happened to her before, fortunately she's very patient, but I've kept her waiting long enough.

Thursday, October 7, 2010

ACEO's


Art Cards, Editions and Originals (ACEO) dimensions- 2 1/2 x 3 1/2 inches

I know they've been around for quite a while, but they're fairly new to me.
With my love of miniatures, and little things, I'm surprised I hadn't heard of them sooner.
I've been making original little/mini paintings, but not to the specific measurements of these art trading cards... until now. I just bought these chipboard cards from krazykatedesigns and was excited to paint them!
Affordable little works of art. How fun is that?

Here's a photo of my 1st group of ACEOs (9), in progress...


So far, I've finished 4 of them- they are initialled on the front, signed & dated on the back, and a clear protective gloss protects the painting.

I used a base coat of gesso to create different textures. It took a long time to dry, before I could actually paint on them.


Here's a photo of the four I've completed.


This mountain scene set of 3 is already sold, but I'm going to list the green mountain scene in my Etsy shop.

I'm looking forward to finishing the other 5, the texture of them reminds me of batik! They'll be completely different from this 1st group. It's going to be fun.

***********************
BTW, I love doing custom orders.
I enjoy the challenge of creating a piece- based on someone else's description, and making it work.
This week I had the opportunity to make a custom pair of turquoise earrings... with lime-green, jade beads. It meant a visit to Abacus Beads, (our local bead shop), on my lunch break, looking for lime green beads.
Among my little treasures, I found these amazing swirl lampwork beads, and couldn't wait to finish work so I could go home and make some earrings. Here they are:
Follow me on my FB fanpage


Tuesday, October 5, 2010

Google yourself.

Ha, ha, you probably thought I meant something bad didn't you?

Sorry to disappoint you, I mean it in the literal sense, have you googled your nickname lately?

If you Google "smilingbluedog", you'll find my stuff... all over the place. Flickr, Etsy, and
now, I'm happy to see, my home website shows up!
And some photos I added of Kokanee Creek Park, are on Google maps too!
Some stuff' is so old, but it's still alive on the Internet. (Reminder to self- don't say dumb things, they stay forever and you never know who is watching.)
I just Googled myself, and found 6 pages of smilingbluedog links! So I tried some of the ones I don't recognize, and wandered off on a goose chase, to see where my name shows up...
My little skull beads are on the Art Bead Scene blog and I'm even on a link called "Cow Ranching" because of my miniature cow skull pin on my homesite!
So try it, Google your name, and see what you get, you may be surprised!


BTW-
I've been asked where did I get the name smilingbluedog?
To save time, I often say it's after our dog - he's so black he's almost blue, and he smiles when he greets you. The true-er story isn't very exciting, but it is what it is.
Years ago, I was trying to set up my 1st Yahoo e-mail account, but the name (I had thought long and hard to come-up with) was taken, so I tried another, then more and all the names I wanted were unavailable!
I was upset to find that I'd been on the computer over an hour and still hadn't completed my "mission".
Yahoo had suggestions, but I wanted to make my own name (like everything else, I try to do/make it myself- yes, it takes longer, but is more rewarding.)

So I put together 3 words that relate to me:
Smiling- because I smile... a LOT! I'm generally a happy person.
Blue- it's my favourite- a creative and energizing colour for me.
Dog- if I were an animal, I'd be a dog. Happy, companionable, faithful, curious, loving.

So now you know :)
*****************
Last night I was in my studio painting... until 1am. I just received these little chipboard cards ordered from Krazykatedesigns and have been excited to paint them. They are my 1st set of ACEO (Art cards, editions and originals.) I'm starting with a group of 9 little pictures, of mountain/landscapes, representative of where I live- in the Kootenays, BC. Each one starts off the same, but as I paint I'm using different colours and texture.
These little pieces are all about technique rather than design. I'm not sure where they'll take me, but that's the whole idea.
I love working in the wee hours, however this time of year it's kind of scary to go from the studio to the house. It's bear season, and our walnut tree is just starting to drop nuts and leaves. They hit the shed and it's startling to hear the loud "bang" of a walnut bouncing off the tin roof. It's driving us and the squirels a little nuts :)
Anyhow, I hope you'll have a great day, and I'd love to hear about
how you came up with your nickname(s).

Friday, August 27, 2010

Idaho Peak


The drive up to the parking lot (above Sandon).


Idaho Peak

Aug 2/10


One of the more amazing views in the Kootenays, is from the top of Idaho Peak.

It's hard to express the sense of awe that I got when we finally made it to the top. It was a long, hard climb for me,

but well worth it.

I hope the pictures speak for themselves, with or without the "narratives".


Still going up...lots of switchbacks & a narrow road.


The trail leading to the lookout on Idaho Peak.


Just some of the wildflowers up there.


Almost at the top.


Views from the top.


Me & Peppy at the lookout. It's not foggy, it's smokey from forest fires.


My thought for today:

"Sometimes I think I'm lucky to be naive. If I had known how much time & effort it would take to get to this point... I probably wouldn't be here :) "


The drive back down is no less amazing.

Monday, August 16, 2010

Working on my website...

I just can't leave everything (computer/indoor related) for winter, so I spent part of this stunning summer day-off, working inside, on the computer- building my own website. Is it cheating if I use their templates? I don't think so- that's why they are there.
I've got a Domain (www.smilingbluedog.com) and have had it forwarded to my etsy shop, until today. As I get familiar with it, I hope to be able to show and sell more of my hand-made giftwares on my own site as well as on Etsy.
For the rest of the day...well... did some laundry, watered lawn & garden (me too), caught a little brown snake (and let him go where I found him), picked a whole bunch of yellow and green beans and froze them, and had a wonderful bar-b-que steak dinner with our family, on the patio.
It's almost bed-time and back to work tomorrow. *pouting*
But... I'm excited to start reading my new book "Shelters of Stone" by Jean M. Auel. It's the 5th book in her Earth's Children novels, that started with Clan of the Cave Bear. ( I've spent most of my lunch hours, breaks and spare-time in a totally different time and space this summer, following the saga of the heroine, Ayla.)
Enough said for now, I'm off to read, before I go to bed.
Enjoy your night (or day)...
Angie

Thursday, July 29, 2010

Fire in downtown Nelson, BC


Downtown Nelson, BC was filled with smoke early this evening.
********************************************************


I was still in town, (Nelson, BC) at 7:30pm tonight.
The air smelled of smoke, as I walked up Vernon St, and then I could see it.

I followed the gathering crowd and the billowing smoke up Ward Street, to Baker.
Firemen were already fighting the fire... it's the Redfish Grill, I was going to go there for lunch today!
It sounds like no one was hurt or in the building (that "they" know of).


Since we no longer have our Nelson Daily News paper- I figured I'd take some pictures and
share the news. Fortunately the "grapevine" works pretty well in a small town. I'm hoping we can read about the fire and maybe see pictures some day soon (next week?)
But I wonder... what else has happened in Nelson since we lost our paper this month?


*******

Note: There was a fire in Ainsworth about a month ago and the Silver Ledge Hotel burned down. It was arson.


Sunday, July 18, 2010

A rainy day in my studio

Today was a particularly stormy day. Lots of thunder & lightening, and finally some rain.
This kind of weather makes it easy to spend the day in my studio.
Recently I bought a small block of self-hardening clay, that doesn't need to be fired in a kiln.
I used the whole block to make a whole bunch of little skulls and one big one.


Now that they've dried for a few days, today was a perfect day to paint them all, so that's what I did. I think they look great all together.

The big skull I made into a wall hanging, complete with glow in the dark beads. Each small skull has a hole in it, so they can be used as beads, or pendants.
I took numerous photos of them, and will add some to my etsy store. I'm just not sure if it would be better to sell them individually, in groups, make them into necklaces or sell them as a supply for someone else to use... in their creations.
I ended up liking some of the photos so much, that I made a few really cool gift cards with them.
A long time ago, I had joined and set up a shop on Zazzle- but hadn't really added anything to it, so I uploaded a couple of skull photos (and grandpuppy photos) and designed some cool buttons, key-chains, mugs, a neckTie, and even shoes!!

Decisions, decisions...
*********************

Updated Oct 29/10

It's almost Halloween, and I've finally added some of the skulls in my Etsy shop.
(I've added links to the photos, and to the highlighted texts.)

Thursday, June 10, 2010

Sorry, I just can't do white shoes...

I bought a new pair of comfy, leather, walking shoes last week.
For 10 bucks they were a steal...except that they were white.

I'm sorry, I just can't do white shoes, especially when anything white
looks like a blank canvas to me.
I should have taken a "Before" picture, but this is close...
I painted them black, wiped most of the paint off, then took this picture.

I've painted canvas shoes before, but never leather.
I probably should have worn them a bit 1st, but I was too excited, so I just went
ahead & painted them.
I'm so pleased with the results, I just had to show them off.
I painted them completely brown (using acrylic paints), then
using a darker brown, I painted the "leaf" designs with a thin brush.

I used a cardboard box as a spray paint booth...
(I used an old toothbrush and a stick to spatter some black
on the shoes, to make them darker and to soften the design.)

I liked the texture and colour, so they're
ready for a clear coat, but I needed them to dry, completely.
Since it was 2am, I left them to dry overnight.

The next day, I used a matt clear coat, but wasn't happy with it,
so I let them dry and used 2 coats of a glossy clear finish.
(I put them under the furnace and
let them "blow dry" between coats.)

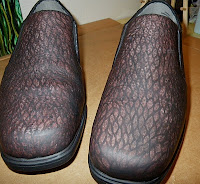
Here's my finished shoes.
I'm not sure how long they'll look like this, but I
think I'll wear them to work tomorrow.
If the paint doesn't last, I'll just wear them at home,
and probably paint them again :)